

Workflow Builder
The Workflow Builder is the visual editor where you assemble an AI Workflow from connected nodes and configure each node in context.
Workflow Builder is where the logic of a workflow version becomes concrete. It is the place to create paths, connect decisions, configure node behavior, and see how one step in the graph leads to the next.
How Builder fits into workflow authoring
Section titled “How Builder fits into workflow authoring”Builder is usually the second major stop after creating a workflow container:
- Open or create a draft workflow version.
- Use Builder to shape the graph itself.
- Use Workflow configuration to manage prompts, tools, variables, and workflow-level settings.
- Test the draft, then publish a version when it is ready.
If the AI Workflows page explains the lifecycle, Builder is the hands-on surface where that lifecycle turns into actual execution paths.
Builder layout
Section titled “Builder layout”Builder is organized into three main working areas:
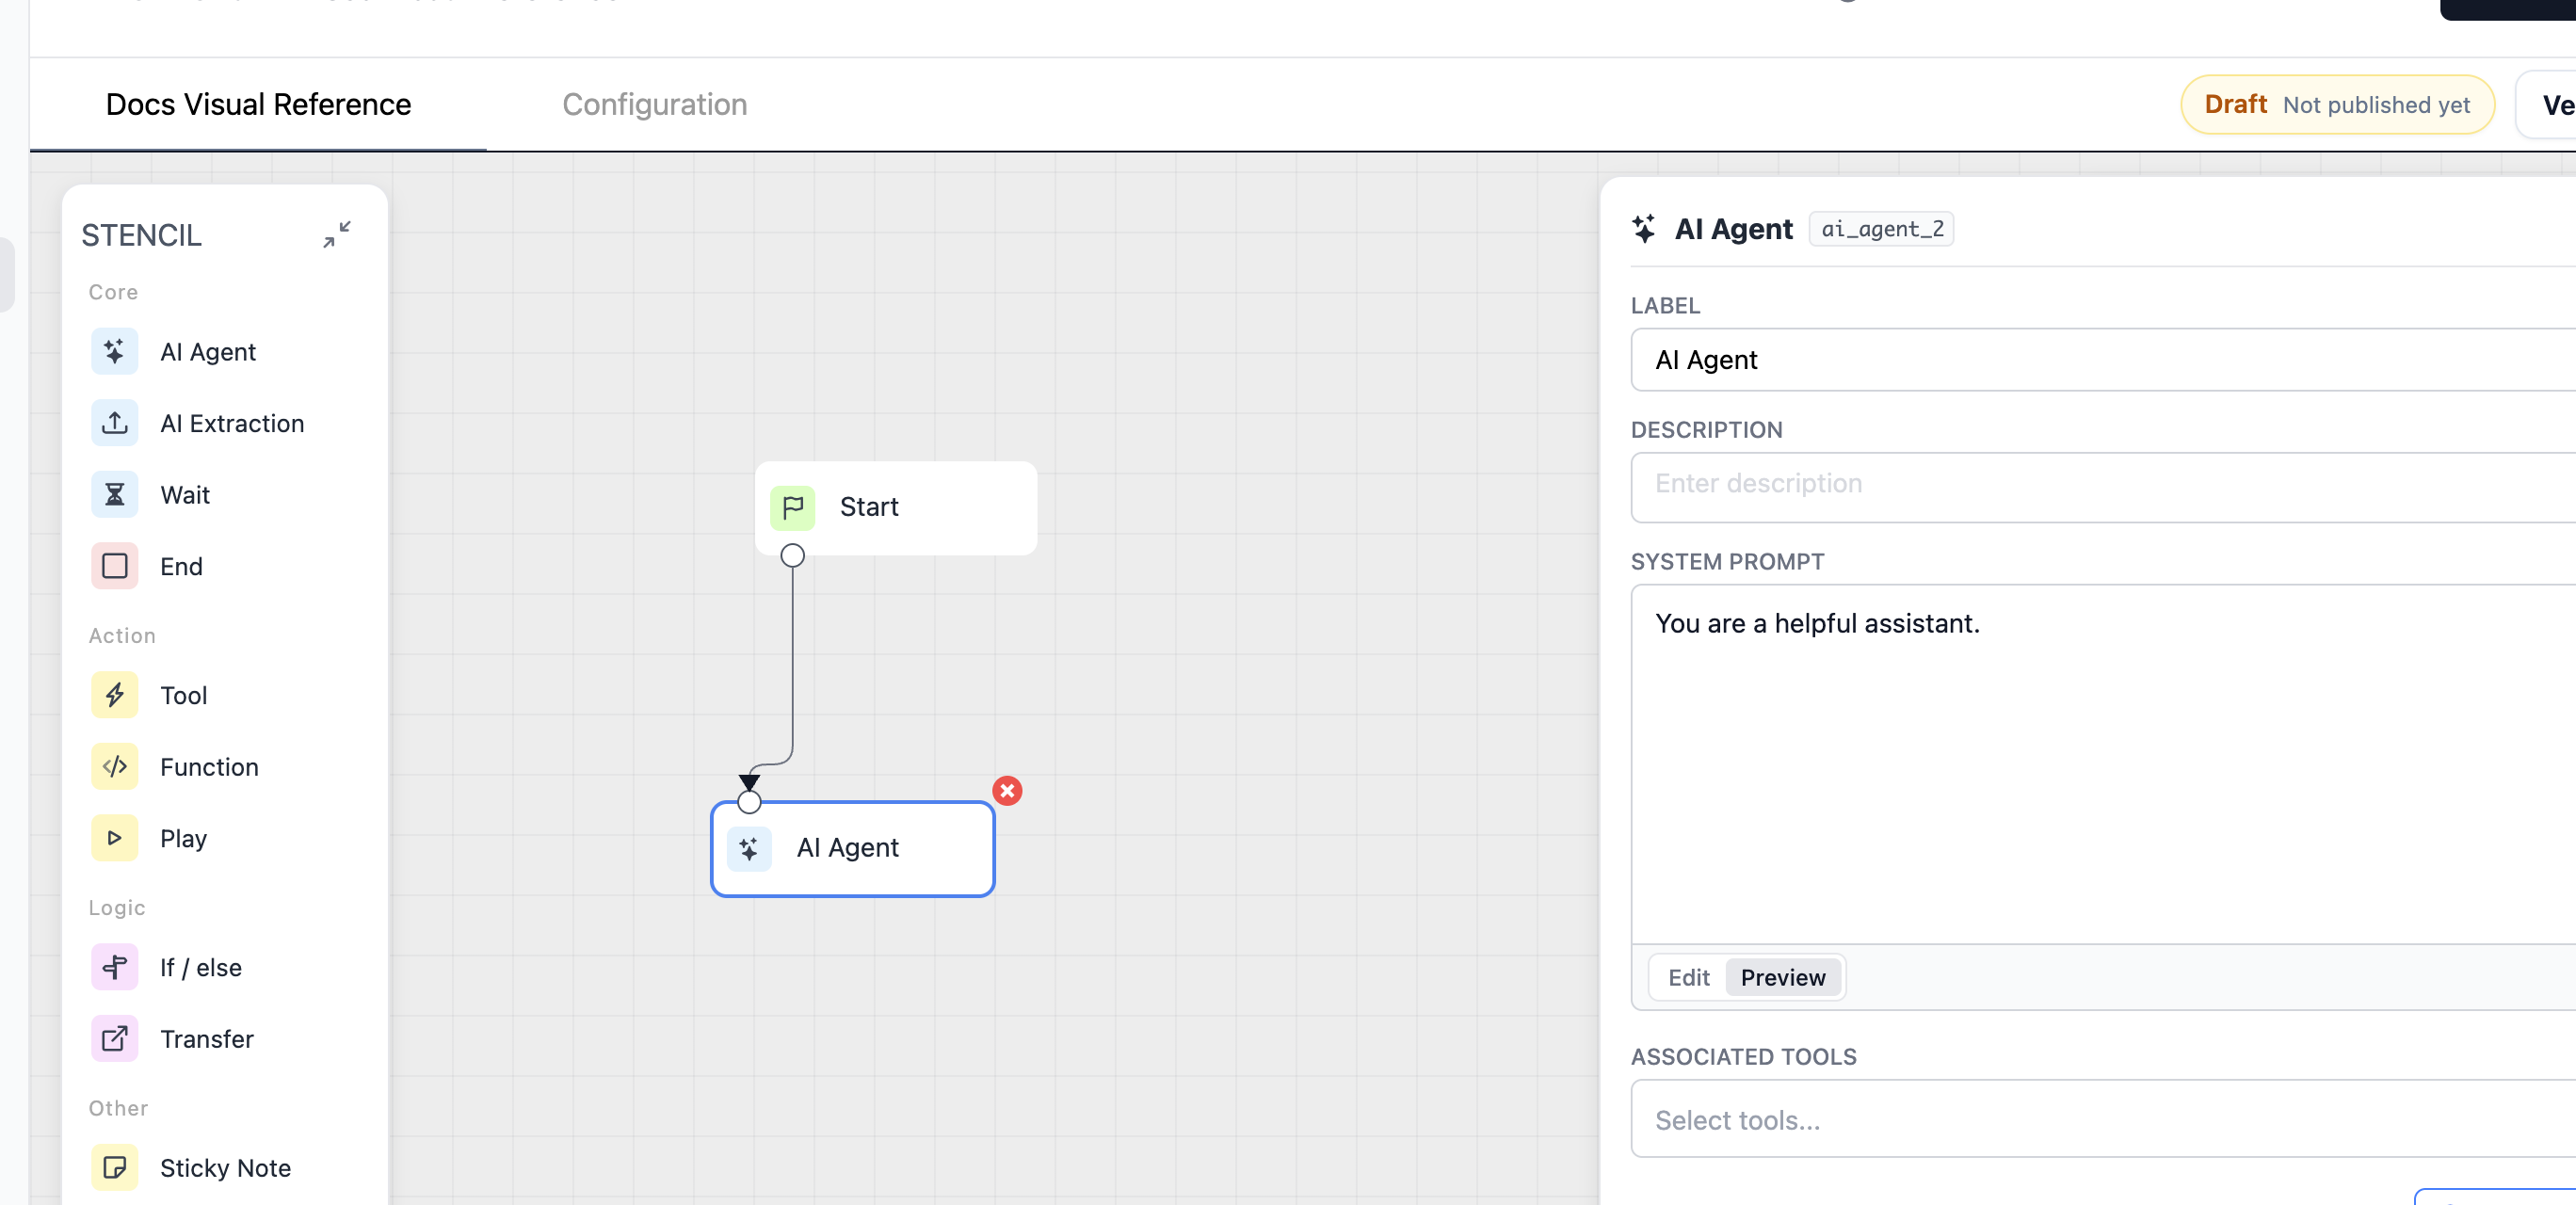
- The stencil panel on the left lists the node types you can add to the graph.
- The canvas in the center shows the flow, connections, toolbar, minimap, and spatial layout of the draft.
- The inspector on the right opens when you select a node and shows the settings for that node.
For most workflows, you move back and forth between those three surfaces continuously: add from the stencil, place and connect on the canvas, then configure in the inspector.
Build a path on the canvas
Section titled “Build a path on the canvas”- Open an AI Workflow draft.
- Drag a node from the stencil panel onto the canvas.
- Select the node to open the inspector.
- Configure the node’s required fields.
- Drag from the previous node’s output port to the new node’s input port.
- Repeat until every branch reaches an End node or an intentional transfer path.
- Click Save Draft.
Start simple. A valid first pass might be just Start -> AI Agent -> End. Once that path works, add branching, tool usage, waits, transfers, or other specialized nodes.
Connect and configure nodes
Section titled “Connect and configure nodes”Most Builder work is a repeating loop:
- Add a node from the stencil panel.
- Place it where the flow should continue.
- Connect it from the previous node.
- Select it and complete the required settings in the inspector.
The graph should read like the runtime path you expect the agent to follow. If the flow is hard to read visually, it will usually be harder to test and maintain as well.
Canvas controls
Section titled “Canvas controls”The canvas includes controls for both editing and navigation:
- Export and Import help you move workflow JSON in or out of the draft.
- Reset clears the current canvas after confirmation.
- Undo / Redo let you step backward and forward through recent edits.
- Zoom In / Zoom Out and Fit to Screen help when the graph grows larger.
Useful interaction shortcuts include:
- Middle mouse or the grab cursor to pan the canvas.
- Scroll wheel to zoom.
- Copy and paste for selected nodes.
- Delete to remove selected nodes or connections.
- Drag selection to select multiple nodes at once.
Inspector behavior
Section titled “Inspector behavior”The inspector changes based on the selected node. Simple nodes expose a small set of fields, while AI Agent and Function nodes use wider inspectors for model, prompt, tool, or code configuration. The inspector is the source of truth for node-specific behavior; use the Node reference when you need field-level guidance.
Troubleshoot the builder
Section titled “Troubleshoot the builder”The stencil panel disappeared. The test panel can replace or hide the stencil panel so you can focus on execution feedback.
A branch does not have a valid destination. Check that every intended path is connected and that the flow reaches an End node or a deliberate transfer path.
The graph feels hard to follow. Rearrange nodes so the main happy path reads left to right or top to bottom consistently before you keep adding complexity.
Why did the stencil panel disappear? The test panel can replace or hide the stencil panel so you can focus on live execution feedback.
Can one output connect to multiple nodes? Each output port supports one outgoing connection. Add branching nodes or dynamic exit conditions when the flow needs multiple paths.
Related pages
Section titled “Related pages”- Node reference - choose and configure nodes
- Testing and debugging - test a draft and inspect runtime behavior
- Versions and publishing - save drafts and publish versions